
Brass Rubbing
Reproducing brasses and incised slabs
Brasses
Most brasses can be rubbed without causing damage to the brass itself. The exception is floor-set brasses where the pitch that helps secure the brass to the stone has perished, leaving a space between the brass and the stone. This condition can be detected by tapping the brass in various surfaces and listening for a ‘hollow’ sound. Brasses in this condition should not be rubbed, because the pressure of rubbing causes the brass plate to flex, stressing the metal and eventually leading to cracking of the brass plate.
If you do find a brass that is coming loose please report this to:
Martin Stuchfield
Hon. Conservation Officer
Pentlow Hall
Cavendish
Suffolk CO10 7SP
conservation@brasses.org
Incised slabs
Greater caution should be exercised when taking a copy of incised slabs. Only attempt to take a rubbing or dabbing when the entire surface of the slab is in sound condition. If the surrounding floor or wall is damp, the surface of the slab may be crumbling or flaking away or may be damaged by surface salts. In these conditions the lightest pressure of rubbing or dabbing can easily cause the worst affected parts of the surface to break away, causing irreparable damage to the slab. The only feasible method of making a satisfactory record of slabs with unstable surfaces without damaging
them is photography.
If you would like to go direct to a particular section click on the heading below:
- Your brass rubbing kit
- How to rub a brass
- Other ways of reproducing brasses and incised slabs
- Positive rubbings
- Photography
- Dabbing
- Your dabbing kit
- How to dab a brass
- Suppliers of brass rubbing paper and wax
- Collections of brass rubbings
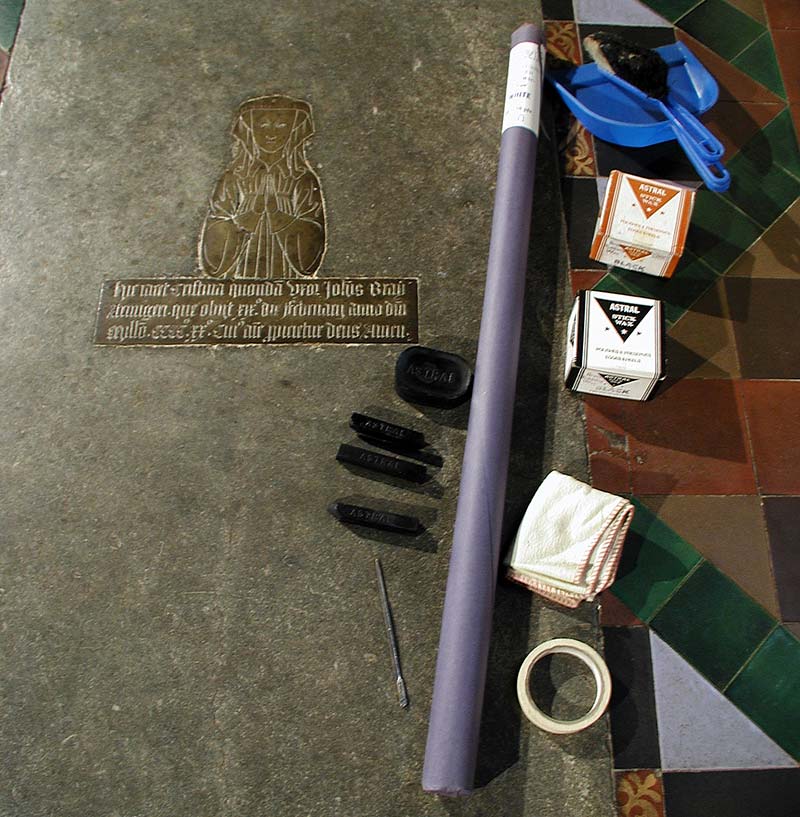
Your brass rubbing kit
To rub a brass you will need the following items:
- Paper a roll of strong but not thick paper, which will not yellow with age
- Wax available in sticks and hand-sized cakes, is best, though other waxes can also be used. Most people use black heelball on white paper, though rubbings in coloured waxes on white paper or metallic gold and silver waxes on black paper also produce attractive rubbings
- Masking tape available from hardware stores, this is used to secure the paper to the stone. Alternatives, such as sellotape, are ineffective and can cause damage
- Scissors
- Duster
- Soft brush
- Dustpan
How to rub a brass
Find a brass The most comprehensive list of brasses is Mill Stephenson, A List of Monumental Brasses in the British Isles (published in 1926 with an appendix in 1938 and reprinted in 1964). The County Series volumes are fully illustrated and are based on an extensive revision of Stephenson’s List. Volumes for Bedfordshire, Berkshire, Buckinghamshire, Cambridgeshire, Cheshire, Cornwall, Cumberland & Westmorland, Derbyshire, Devonshire, Dorsetshire, County Durham, Essex, Gloucestershire, Hampshire and the Isle of Wight, Herefordshire, Hertfordshire and Huntingdonshire have been published to date. The volume for Norfolk is currently at an advanced stage of preparation.
Seek permission to rub from the incumbent or churchwarden/s. Book an appointment to avoid clashing with church services and other church activities. Most churches permit rubbing, normally on payment of a fee or a donation to the church fabric fund. Some churches provide resin facsimiles of brasses for rubbing; where available these should always be used except for rubbings for historical records – your rubbings will be just as good as one taken from the brass.
-
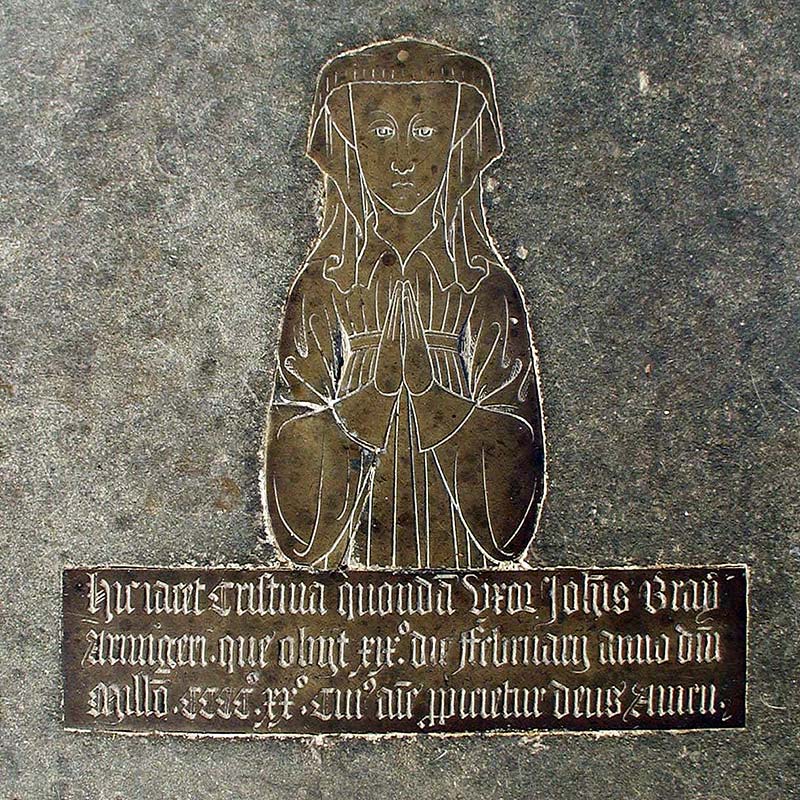
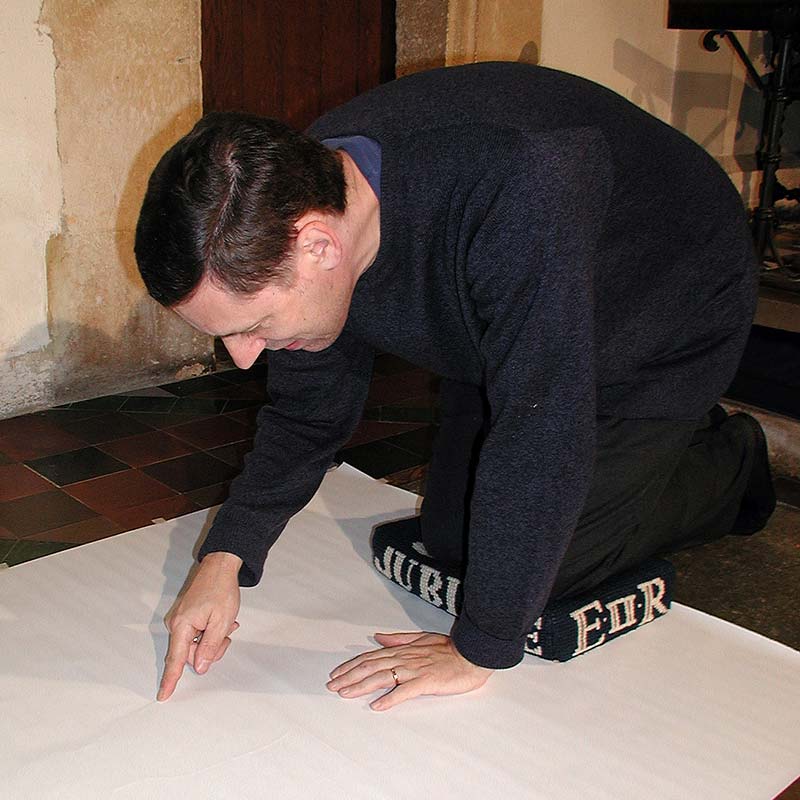
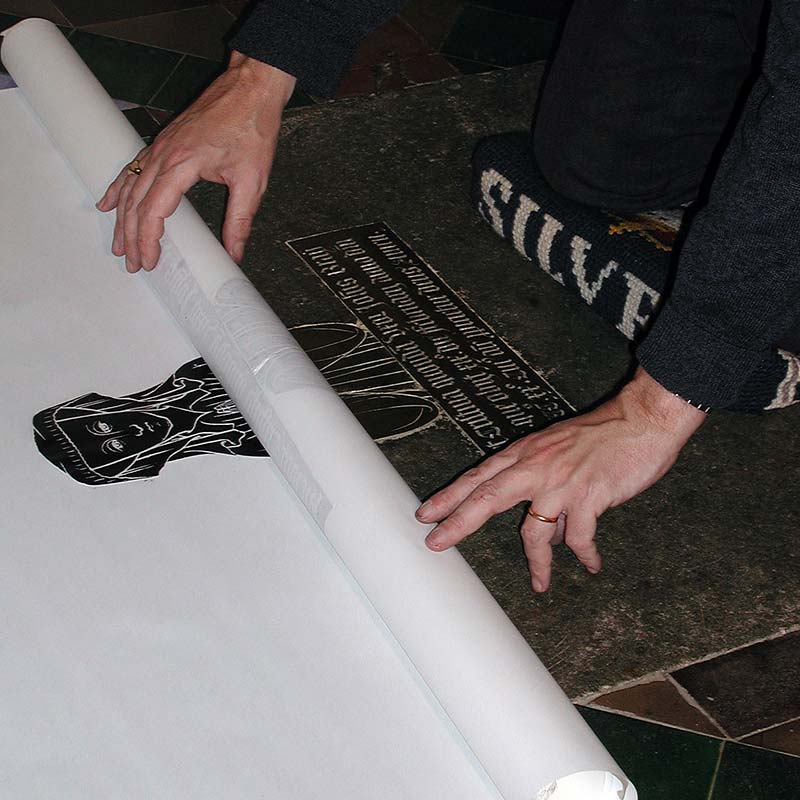
Locate your brass
Locate your brass The one shown here is a demi-effigy and inscription to Christine, wife of John Bray, esq., 1420 at Felsted, Essex.
-
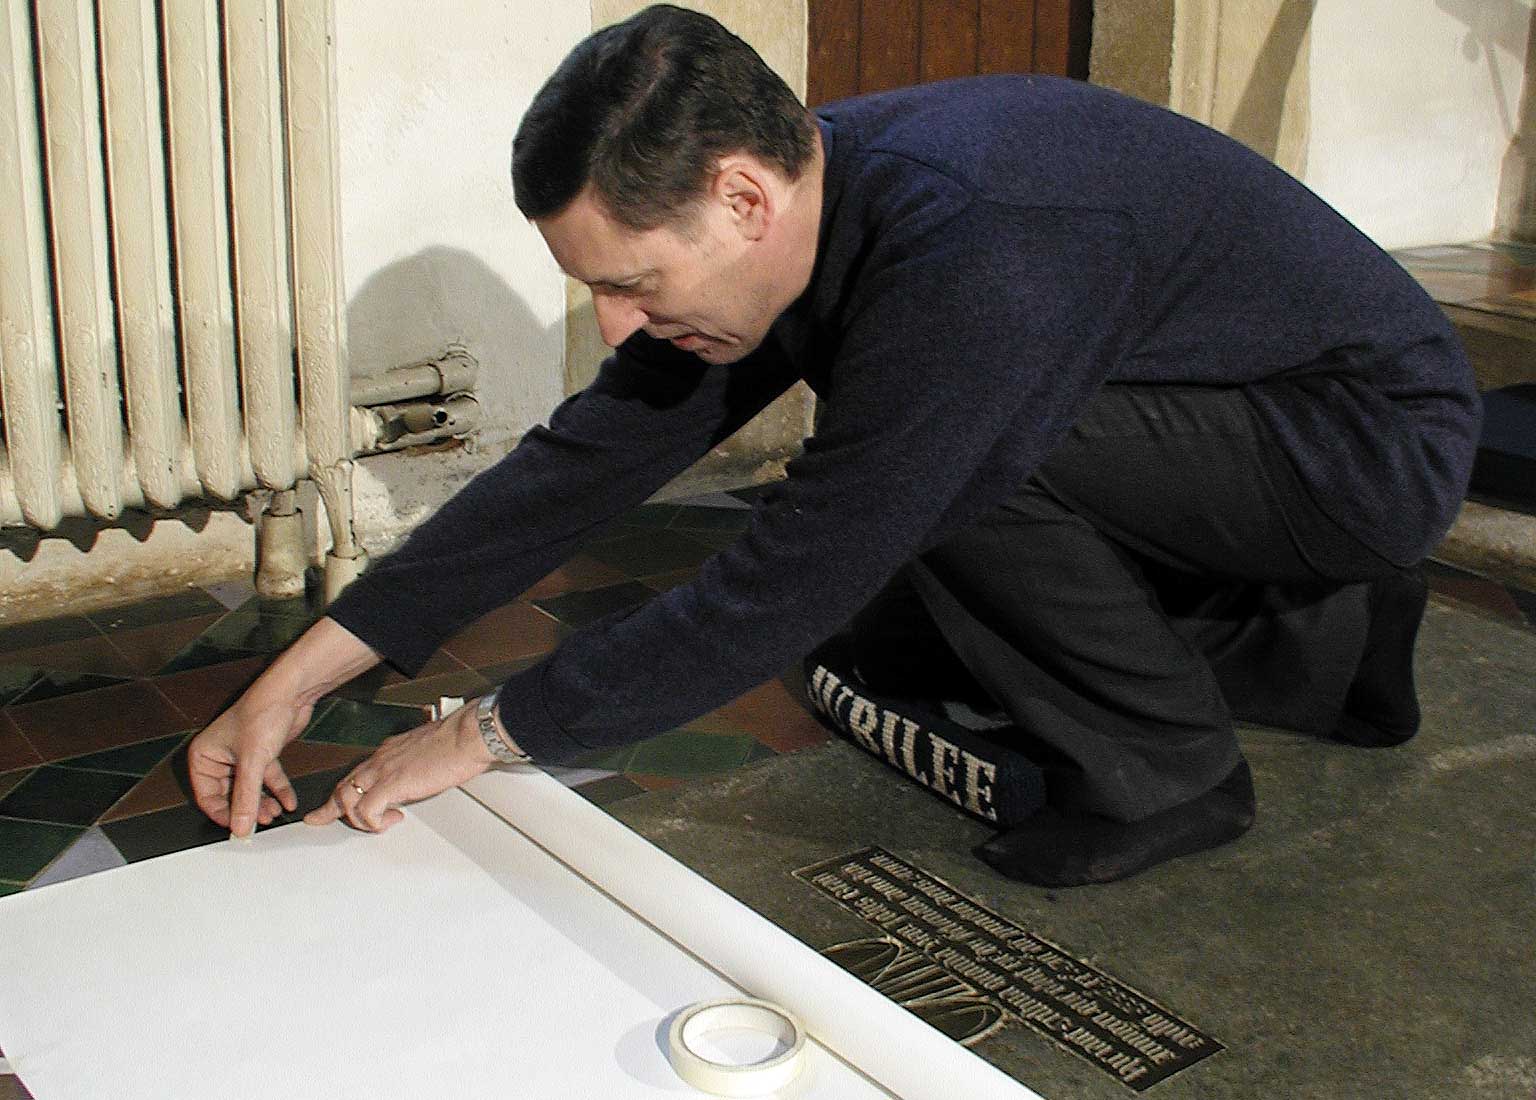
Assemble your brass rubbing kit
Assemble your brass rubbing kit of paper, heelball, masking tape, scissors, soft brush, dustpan and duster. Remove your shoes and any other hard object that might scratch the brass.
-
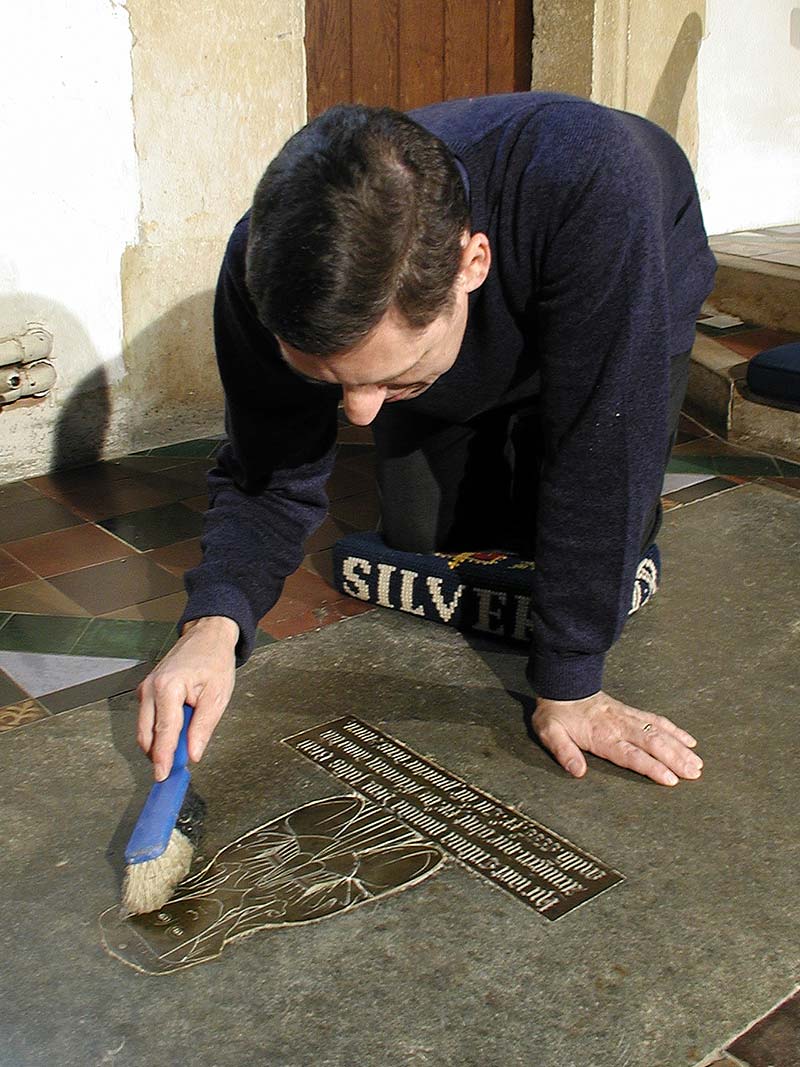
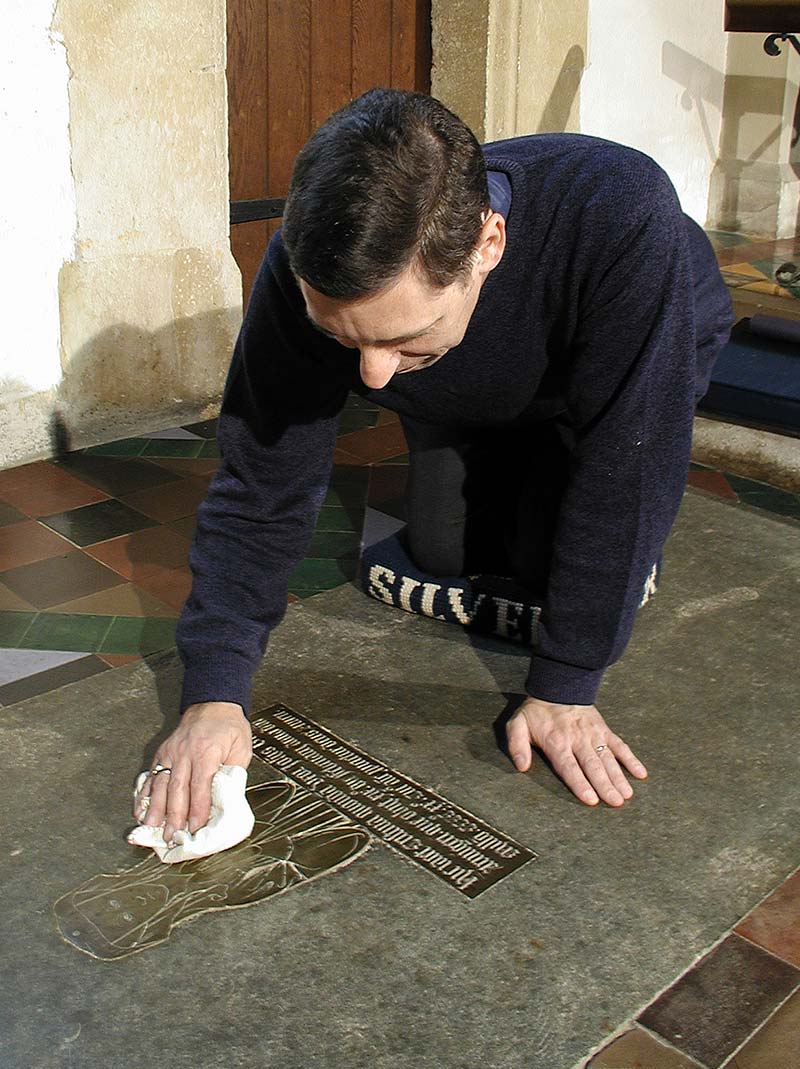
Clean the brass
Clean the brass Kneel, by the side of the brass not on it, and carefully brush any grit or other debris from the brass and the surrounding stone. If the brass is not cleaned properly, grit may damage the brass and tear the paper, spoiling your rubbing.
-
Dust the brass
Dust the brass with your duster to remove any remaining dust or grit.
-
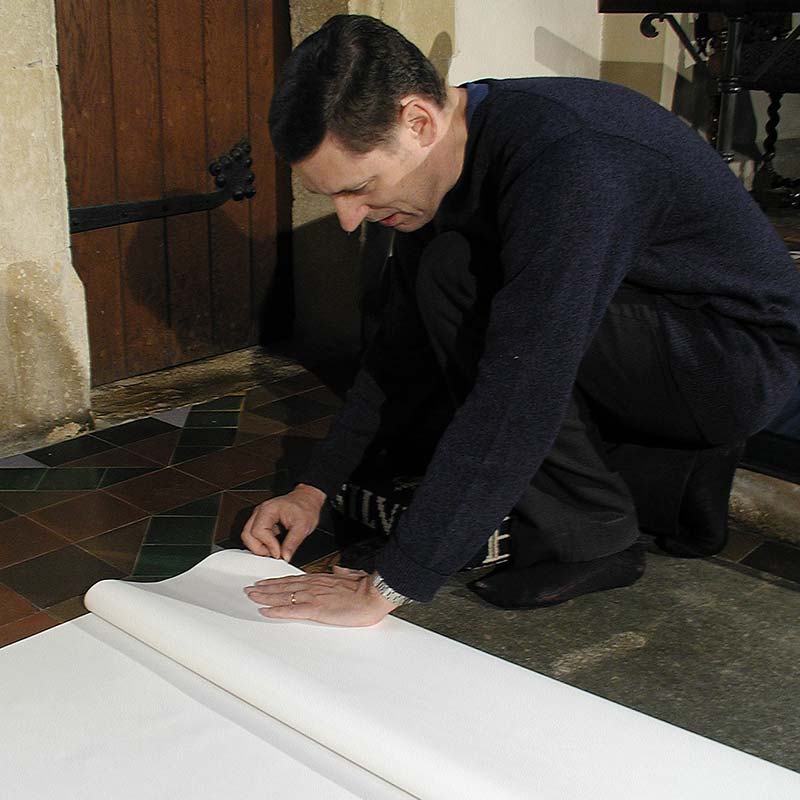
Cut a length of paper
Cut a length of paper, leaving a reasonable margin at top and bottom. Be careful not to damage the slab or brass with the cutting implement (knife).
-
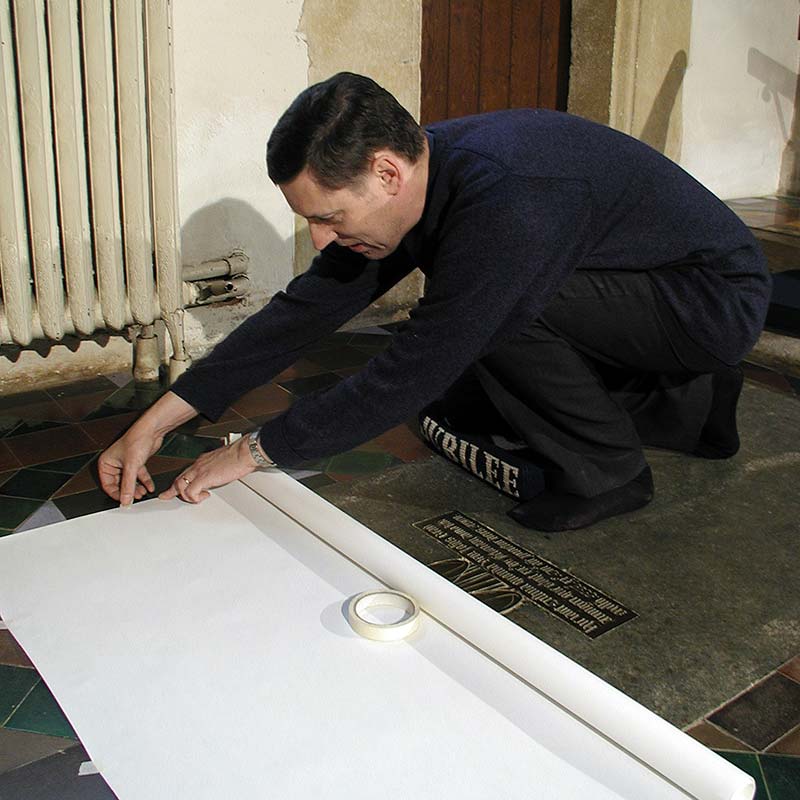
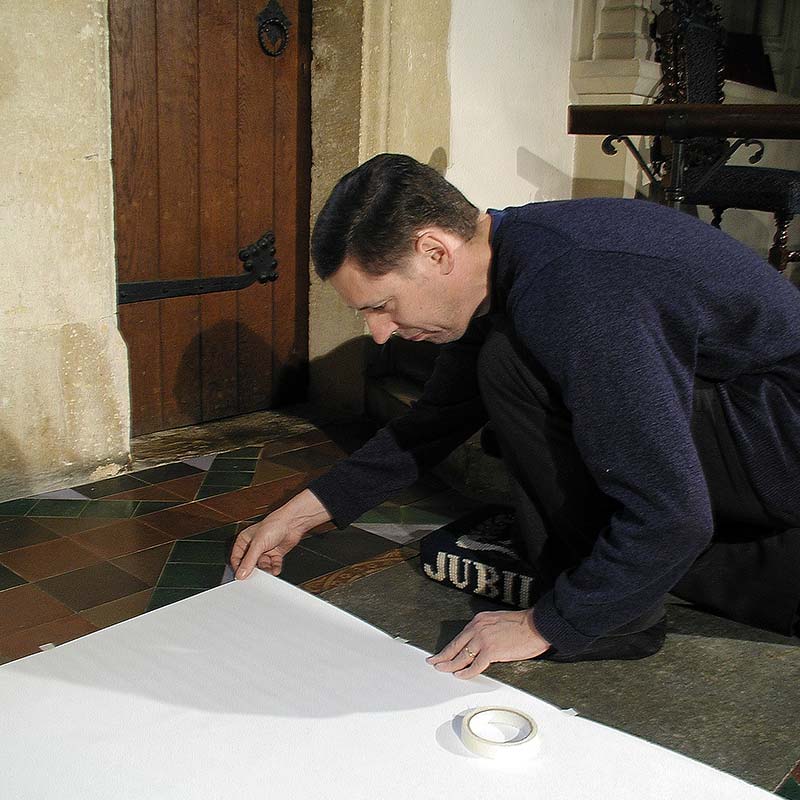
Stick the paper to the stone
Stick the paper to the stone. The paper must be taughtly fixed to the stone or wall, with no wrinkles. Secure the paper at the top and roll it down. Stick it on one side, with strips of masking tape every 6-8 inches, positioned at a downward angle. Make sure the paper is stretched tightly, then stick the other side and bottom of the paper.
-
Stretch the paper
Stretch the paper. If the church floor or wall surrounding the brass is damp, the paper will stretch more than usual and could cause your rubbing to be blurred. To avoid this problem, fix the paper initially with fewer pieces of tape, then leave it for 20 minutes, stretch the paper tight and re-fix it with tape every 300-400 millimeters.
-
Outline the composition
Outline the composition with your fingers so the edges of the brass plates stand out and you avoid inadvertently rubbing over them. If rivets are protruding they may cause tears in your rubbing. Make small holes in the paper to enable it to lie flat on the brass. The holes can easily be repaired from the back when your rubbing is complete.
-
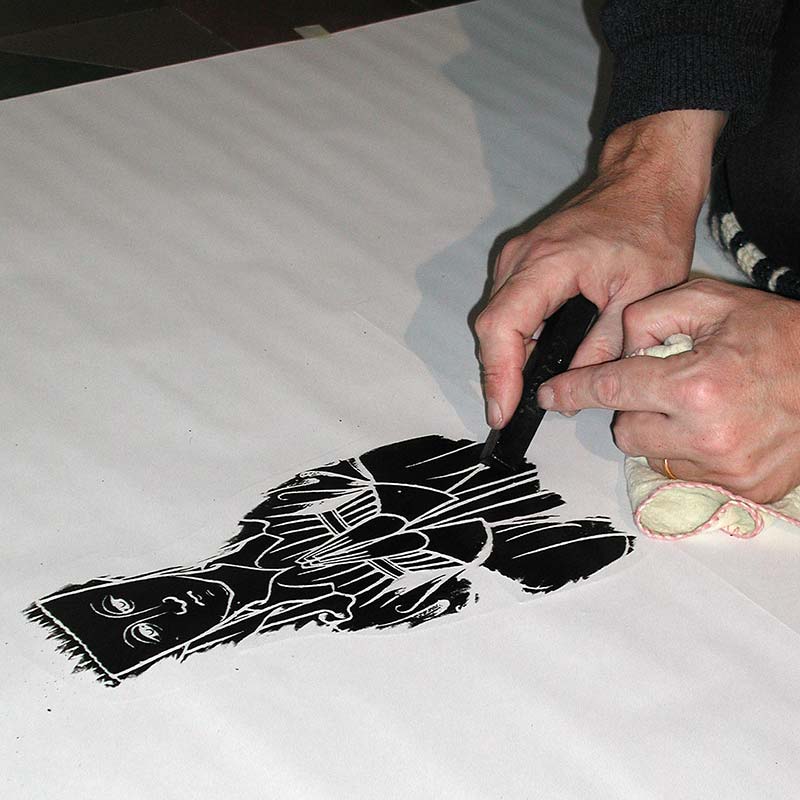
Rub with the heelball
Rub with the heelball beginning at the top of the brass. Hold the heelball fairly flat in one hand and with the other hand make an L shape by stretching out the thumb and laying the palm flat on the paper. By rubbing within the outstretched hand it is easier to control the length of the strokes. Try to rub in one direction only (preferably up and down, following the main lines of the engraving) and aim for an even finish.
-
Avoid going over the edges
Avoid going over the edges by leaving them until you have rubbed the central adjoining part. By positioning a piece of cardboard by the edge of the brass you can avoid making unwanted marks.
-
Work systematically
Work systematically, finishing each section in turn; the paper may stretch under the pressure of rubbing so that if you return to a section to touch it up, blurring may occur. If the engraved lines are deep, rub hard to get a jet-black finish, but if the brass is worn a better reproduction is achieved by rubbing more gently and aiming for a grey finish.
Finish the rubbing by checking carefully that you have rubbed all parts of the composition and have rubbed right to the edges of the plates.
-
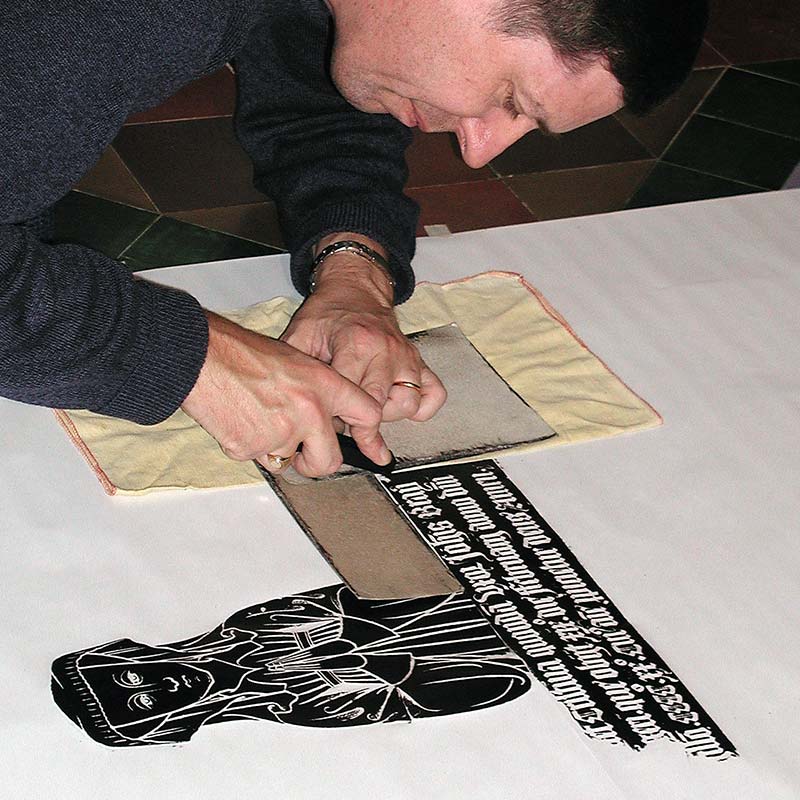
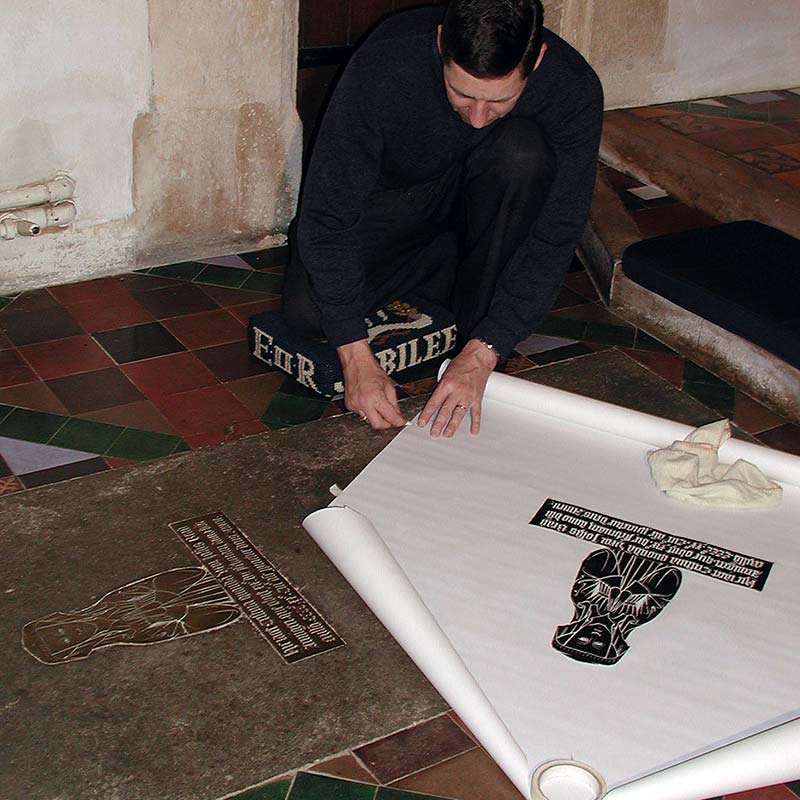
Remove the paper from the slab
Remove the paper from the slab. Ease the tape from the outside, taking care not to tear the paper. If any of the brass has been obscured by the tape.
Take off the piece of tape and rub where it has been.
-
Take the tape off
Take the tape off the paper, by easing up the inner edge and peeling away in an outwards direction to avoid tearing.
-
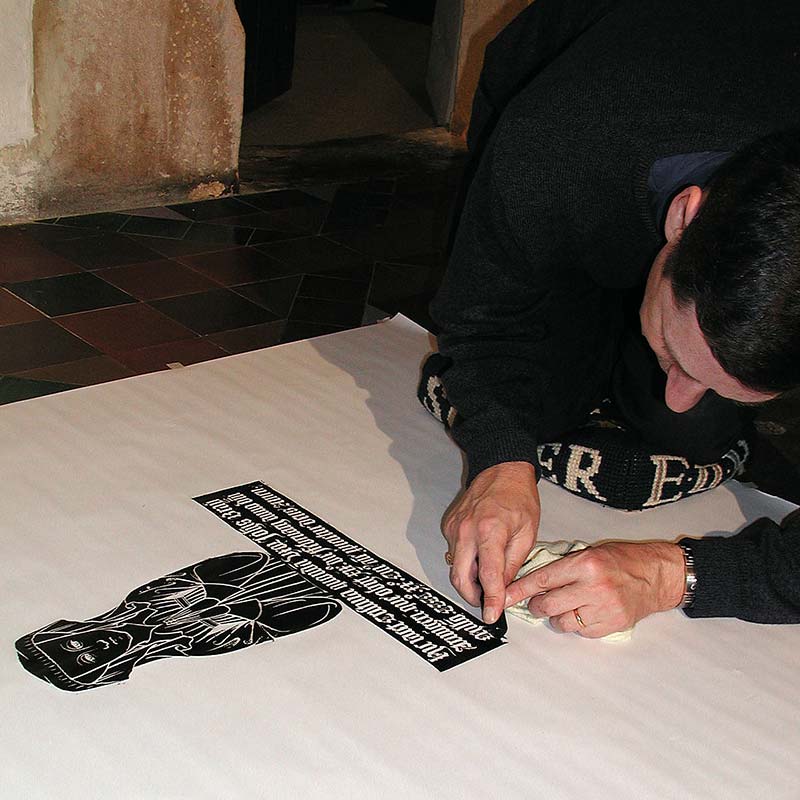
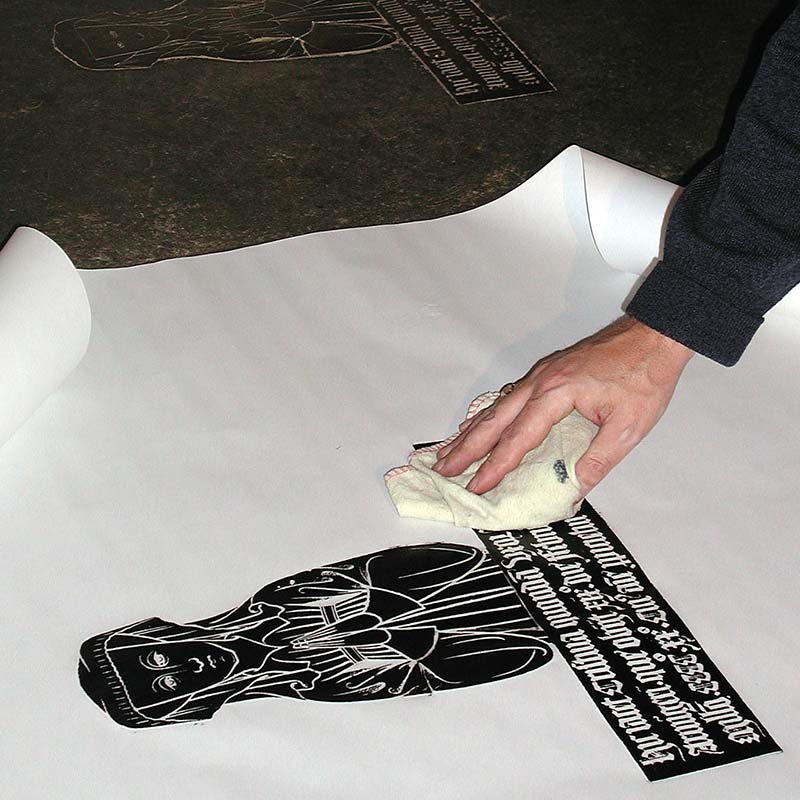
Polish the rubbing
Polish the rubbing by gently buffing with a soft duster.
-
Clear up
Clear up by sweeping up any flakes of heelball and scraps of paper of tape.
Admire your completed rubbing.
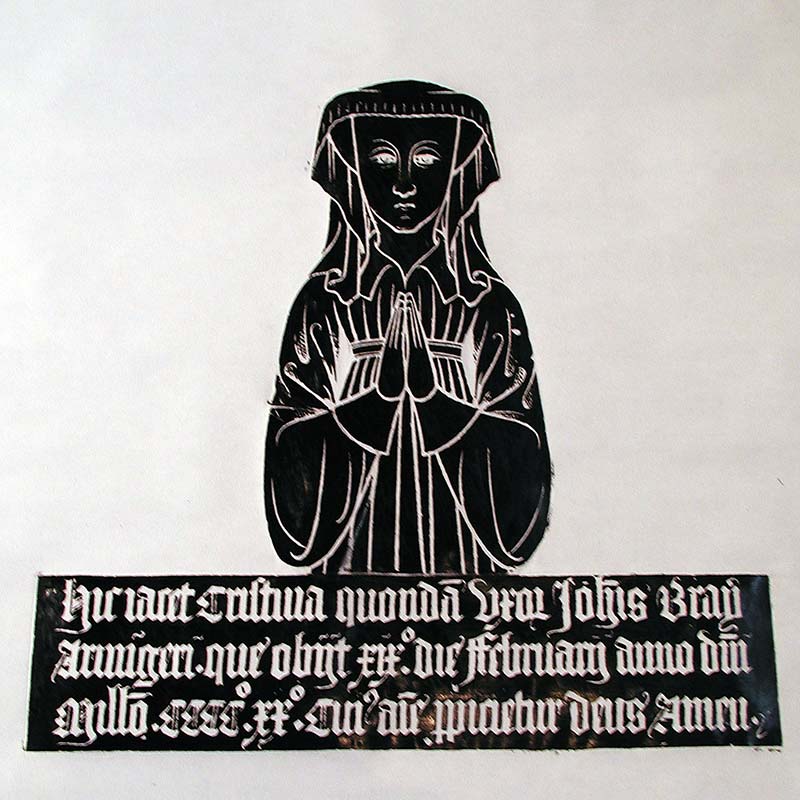
The rubbing was produced by Martin Stuchfield, M.B.S. President.
Photographs by John Stuchfield.
Other ways of reproducing brasses and incised slabs
Positive rubbings
The method outlined above makes ‘negative rubbings’ in which the surface of the brass is coloured black, gold or whatever colour is chosen and the engraved lines are left white. ‘Positive rubbings’, which in which the lines are black with the surface left white, provide an excellent base for the application of decorative colour for heraldic dress or shields of arms. To achieve this follow the procedure for negative rubbings above. Then when you get home rub over the surface of the rubbing with a rag soaked in waterproof black ink.
It will colour the paper only on the un-waxed lines of the engraving. Clean off excess with kitchen roll. When the ink is dry, rub over again with a rag soaked in paraffin to dissolve the heel ball. The rubbing can then be coloured at choice and if necessary the black lines touched up.
Photography
This is the best way of recording incised slabs and is particularly effective in recording alabaster slabs which retain coloured mastic in the lines. The details of the composition are best brought out with the help of a florescent light source positioned at a low angle so that the incised lines are shadowed.
Brasses can also be photographed, but great care must be taken to ensure that the brass is evenly lit, ideally using photoflood sources. The use of a camera-mounted flash is inadvisable, since reflections often mar part of the photograph.
For detailed advice on photographing brasses read:
M. Norris and M. Kellett, Your Book of Brasses (London, 1974), pp.59-64.
Dabbing
This is particularly effective for brasses which are worn or finely engraved.
Your dabbing kit
To dab a brass you will need the following kit:
- Paper Tissue paper is best, but thin detail paper can also be used.
- Dabber Take a ball of cotton wool about the size of a fist and place it on a piece of chamois leather, then secure the leather tightly round the powdered graphite available from art supplies shops.
- Linseed oil Available from hardware stores. An alternative is a good quality salad oil.
- Fixative spray Available from art supplies shops.
- Two pieces of cardboard or hardboard about 300mm square
- Palette knife
- Masking tape
- Scissors
- Duster
- Soft brush
- Dustpan
How to dab a brass
- Prepare the dabbing medium by mixing oil and graphite to a stiff paste with a palette knife on one piece of cardboard;
- Fix the paper as described in steps 1-7 of the brass rubbing instructions above;
- Dip the dabber into the paste – wipe off any surplus onto the second piece of cardboard;
- Press the dabber onto the paper – avoid any rubbing movement as this will stretch the paper. Work systematically covering the whole brass and recharging the dabber with paste as necessary; and
- Fix the dabbing with the fixative spray to avoid smudges (optional).
Suppliers of brass rubbing paper and wax
You may be able to find heelball and brass rubbing detail paper in good art supplies shops. Alternatively they are available by post at the following
Heelball
The wax that is recommended is the Abbey brand available from:
Michael Ward
White Hall Farmhouse
Brickyard Lane
Crewkerne
Somerset TA18 7BA
Telephone: 01460 76585
Paper
Wide format paper (50 metres (length) x 914 mm (width)) is available from www.monkeyoffice.co.uk quoting XX97742 currently available in packs of four rolls at £69.44 including V.A.T.
Collections of brass rubbings
There are a number of collections of rubbings of brasses, many of which contain rubbings of lost brasses and rubbings of brasses which have since been mutilated.
The most complete collections of brass rubbings are held at:
- The Society of Antiquaries of London
- Ashmolean Library, Oxford
- British Library
- Cambridge University Library
- Victoria and Albert Museum
The only national collection of rubbings and dabbings of incised slabs is held in the Library of the Society of Antiquaries of London.
In addition, a collection of brass rubbings, as well as other items relating to the M.B.S. and brasses has been deposited at the M.B.S. Malcolm Norris Research Centre at the University of Birmingham. Anyone who wishes to gain access should contact the Birmingham University Library Admissions Office to arrange for a reader’s ticket (switchboard number 0121 414 3344).
Right: monumental brass to Richard Billingford, D.D., Master of Corpus Christi College, [Chancellor], 1432, from Cambridge (St. Benedict). Photo: ©Martin Stuchfield